31 years ago, when I was 27, I started the Campos Photography Center. My motivation was doing what I like to do. I love facilitating, problem solving, building, maintaining, fixing, and improving infrastructure. My goal was to design a system that would give image makers the tools and support to make prints just like they imagined. Today I have the same desire. It just feels a little clearer in my mind.

I love process.
In getting from here to there, some think of going from point A to point B, let’s do it, the direct line, as quickly as possible, as cheap as possible.
I like to think that from here to there is more like point A to point Z: there is a whole alphabet in the middle, and, even more, an infinite way to mix and rearrange that middle, so that even though we all end up at Z, the ways to get there can be so immensely different and pleasurable.
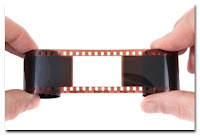
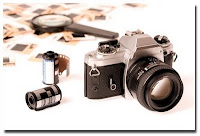
In 1979 the basic process of making a print involved the following steps:
a. click the shutter & expose the film
b. process the film
c. make proof prints
d. evaluate results
e. make a printIn 2010 the basic process of making a print involves the following steps:
a. click the shutter, evaluate results immediately and reshoot as necessary
b. enhance the image, as desired
c. make a print Back then, each of these steps presented issues. The time from clicking the shutter to evaluating the results involved a time delay, which was at best a trip to the lab, plus a couple of hour wait. More typically, the delay was a couple of days. The option to reshoot was only a possibility in controlled studio situations. In most real life situations, the moment, place and time were long gone by the time you could evaluate your results. It was very difficult to enhance the film and/or the print, and you had very limited options.
I saw each of these issues as an opportunity to improve the process for the photographer and build a business for myself and my team. Focusing on the issues that we could directly influence everyday, we made excellent film processing the cornerstone of our lab. We developed fast and economical methods to make proof prints to evaluate the image and we taught customers to do it for themselves.
We also knew that if clicking the shutter and exposing the film was not done properly by the photographer every other step down the line would be compromised. We concentrated on creating a learning environment in our lab where photographers could teach each other the basics and, as their knowledge increased, they could work together learning new techniques to advance.
We paid attention to teaching the basics and encouraged peer to peer learning for advanced evaluation. We explored basic and advanced ways to print exactly the image you imagined. We found that doing less is just as important as doing more. The key was in understanding what you wanted and using our tools and skills to execute your wishes properly. The greatest challenge was developing a vocabulary that we both clearly understood.
We used basic techniques for print enhancements, like cropping, borders, dodging and burning, that greatly improved the image. We learned the power of enlarging an image past the point of self imposed artificial limitations. And we knew that the process was not complete until the print was ready for display and hanging on the wall.
We enjoyed the process of developing our craft and moving towards mastery. And we greatly enjoyed being able to add value to our community of artists.
Today it feels like we are starting again, but we are a little older, and hopefully, a little wiser. All of us are just scratching the surface with the possibilities of digital photography. In the first few years we are communally fascinated with the magic of being able to shoot an image, see the results immediately, and share that image with anybody and everybody, anywhere in the world for free.
We have been crawling and we are fascinated with taking those first steps. I have been a father 4 times and I know how important and joyous it is to witness and celebrate those first steps, but eventually we move on. Photography version 1 (camera-> film negative -> proof print -> print) has had a wonderful 150+ year history. Photography version 2 (digital camera -> digital image -> digital display -> print) is in its infancy.
With iPrintfromHome.com we have already started taking baby steps to help you image your imagination today. In digital photography you can now click the shutter and evaluate results immediately and reshoot as necessary. Our focus with this step is to facilitate the sharing of best practices and success stories through the “Who, What, Why” series featuring customers like you.
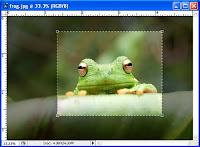
Digital Photography has opened up a world of opportunities in image enhancement. We define ‘image enhancement’ as those changes you can make to your image file after you shoot the picture and before you order the print. We add value with this step by providing easy to use tools and services to facilitate simple actions you can take to greatly ensure that the print you get is the print you want.
Our ‘Crop & Composition’ Tool is our newest, easiest and most powerful ‘image enhancement’ tool. It allows you to experiment and visualize in real time the effect of cropping decisions like “Smart Fit” or “Crop-to-Fill”. It allows you to try different size borders, to make your borders white, gray or black, to add strokes to your prints.

With the ‘Crop & Composition’ Tool you can combine images in several, popular, pre-defined templates. You can position each image cropped exactly the way you want. You can experiment and see immediately the results and only place the print order when you are perfectly satisfied.
You can see how your image fits in standard paper sizes, and also try the very popular panoramic sizes, in aspect ratios 1:2, 1:3 and 1:4. Best of all if you are confused by any or all of the choices I am writing about, you can simply try the ‘Crop & Composition’ Tool and see for yourself. (You’ll see a link to the ‘Crop & Composition’ on the “Place Order” page, right above the “Check All” button.)
Finally we help you make your print. Our focus with this step is to maintain and enhance the use of materials and processes that ensure that the print we make is a faithful representation of the image in your mind. We do this by making sure our technology is state-of-the-art, by using the best papers available, and by maintaining and monitoring the process to ensure complete consistency from one order to the next. The more we are perfectly predictable, the more comfort we give you to be perfectly creative. We get great satisfaction from doing our job to enable you to do yours.
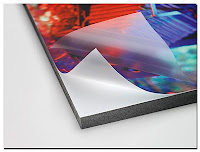
We have also just begun
to offer mounting and laminating options so that
the print we make for you is
ready for display.
We continue to make improvements in the process. From your loyalty and your support it is clear that you continue to understand the power of working with a team that is intent on helping you get exactly what you want. Our belief in your work and in your integrity and professionalism allows us to stand behind our products and services with a 100% no fault, satisfaction guarantee. We trust you to be the best artist you can be. Thanks for giving us the opportunity and for trusting us with the process of imaging your imagination.
As much as I have enjoyed the last 31 years, I feel like a kid, bubbling with excitement, anticipating the next 31.
Thanks again,
George


